Setup SSL certificates for your Homelab with Caddy and Namecheap
In this post I’ll walk you through how to set up a domain name with a SSL certificate for your Homelab or internally accessible services. Goodbye “not secure” warnings! 🏌️♂️
I purchased my domain through Namecheap and used Caddy as my web server, so this post is suitable for others who have done the same. horsey.top 🫡 was less than $2 USD.
Obtaining a SSL certificate relies on the DNS provider module (or plugin) for Namecheap. This enables Caddy to interact with your domain records in your Namecheap account.
When Caddy has programmatic access to your Namecheap account, it can add/delete the txt records required for ACME DNS challenge:
- Caddy contacts Lets Encrypt (Certificate Authority) for a unique random token.
- Caddy creates a TXT record using that token in your Namecheap account:
_acme-challenge.<YOUR_DOMAIN> - Lets Encrypt queries the DNS for that record to verify ownership.
Caddy will then routinely access your Namecheap account to renew your SSL certificate so you don’t have to ✊️
Download and install Caddy
In order to use the module you need to run a custom Caddy build with the DNS provider module included. There are two approaches:
- Download a custom build from Caddy download page.
- Create a custom build using
xcaddy.
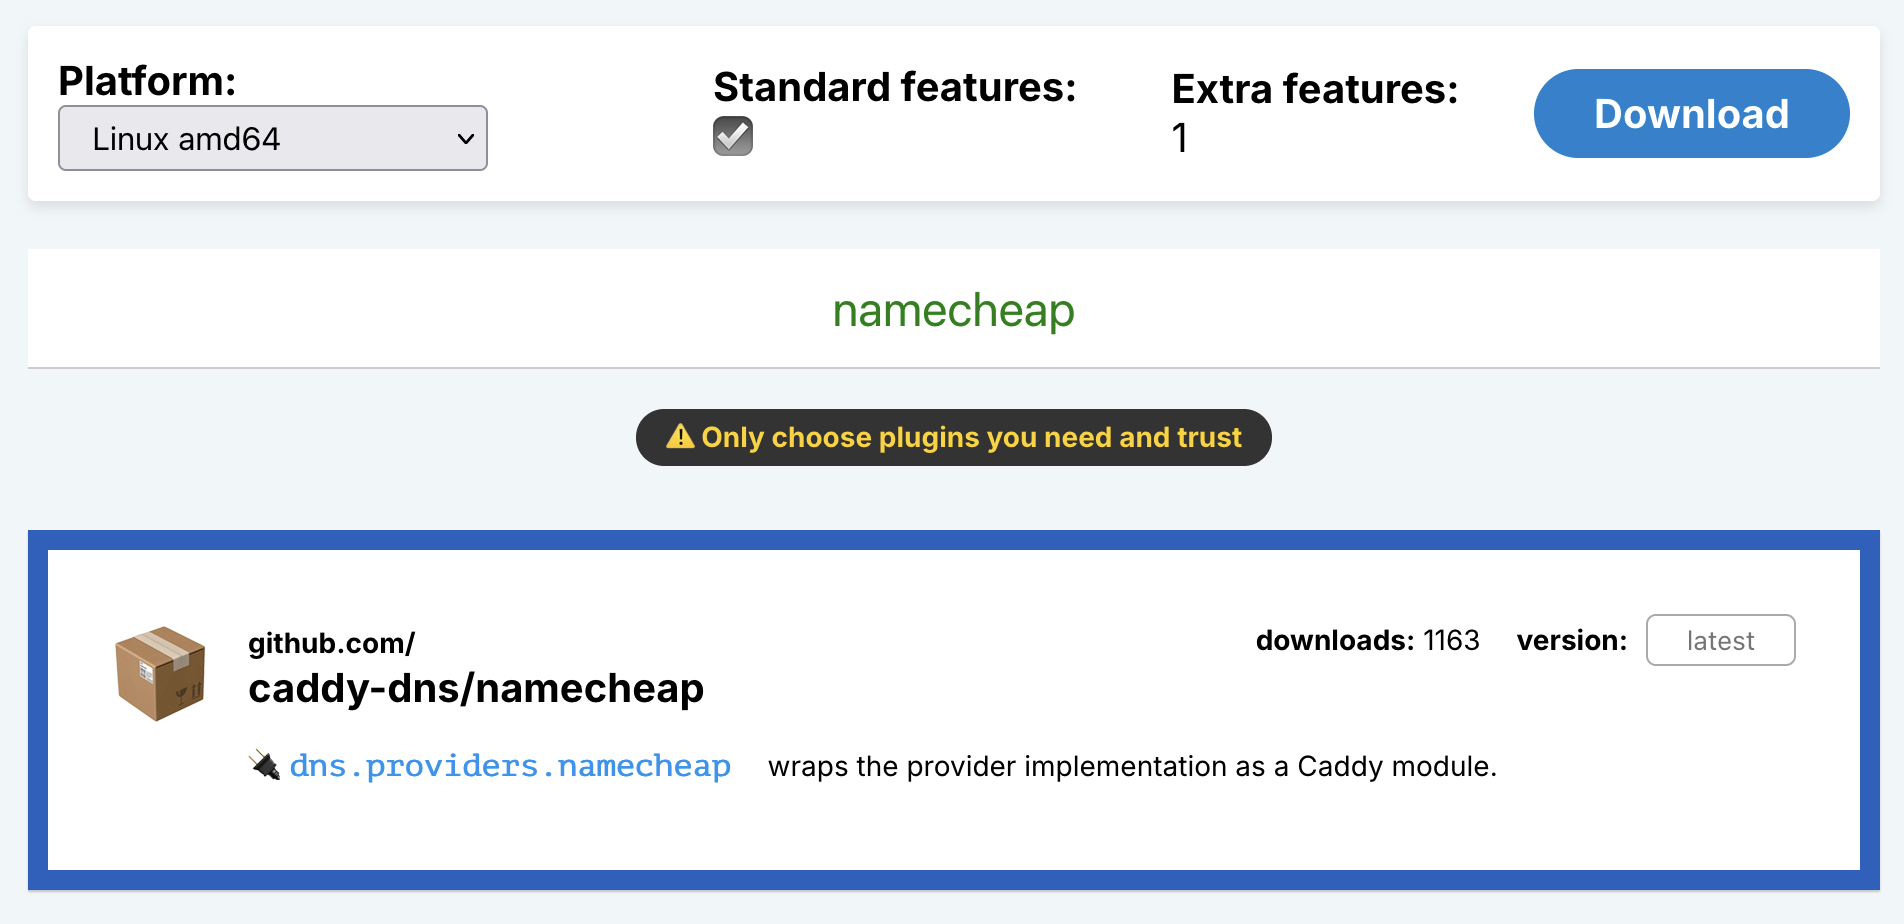
I went with the first option. On the Caddy downloads page, search for “namecheap” and select the “github.com/ caddy-dns/namecheap” module. Choose your Platform and click “Download”.
Linux setup
The recommended way to run Caddy on Ubuntu is as a systemd service. This can be configured as below.
- Install the standard Caddy version first
sudo apt install -y debian-keyring debian-archive-keyring apt-transport-https curl
curl -1sLf 'https://dl.cloudsmith.io/public/caddy/stable/gpg.key' | sudo gpg --dearmor -o /usr/share/keyrings/caddy-stable-archive-keyring.gpg
curl -1sLf 'https://dl.cloudsmith.io/public/caddy/stable/debian.deb.txt' | sudo tee /etc/apt/sources.list.d/caddy-stable.list
sudo apt update
sudo apt install caddy- Replace the standard Caddy binary with the custom build
See: Package support files for custom builds for Debian/Ubuntu/Raspbian
Swap in-place (using symlinks) your current Caddy binary (containing dns.providers.namecheap module) with the custom Caddy binary
sudo dpkg-divert --divert /usr/bin/caddy.default --rename /usr/bin/caddy
sudo mv ./caddy /usr/bin/caddy.custom
sudo update-alternatives --install /usr/bin/caddy caddy /usr/bin/caddy.default 10
sudo update-alternatives --install /usr/bin/caddy caddy /usr/bin/caddy.custom 50
sudo systemctl restart caddy
Check Caddy build
Once downloaded, or installed as above, you can verify the correct custom binary has been installed. If it is not already, you should add the Caddy binary to your PATH.
caddy list-modulesSee “Non-standard modules: 1”.
...
tls.leaf_cert_loader.storage
tls.permission.http
tls.stek.distributed
tls.stek.standard
tls.permission.http
tls.stek.distributed
tls.stek.standard

  Standard modules: 121

dns.providers.namecheap

  Non-standard modules: 1

  Unknown modules: 0
Update domain name records
Now head to your Namecheap account. Navigate to Profile > Tools > Business & Dev Tools > Namecheap API Access and click Manage.
Or the settings page can be accessed directly at Namecheap API Access.
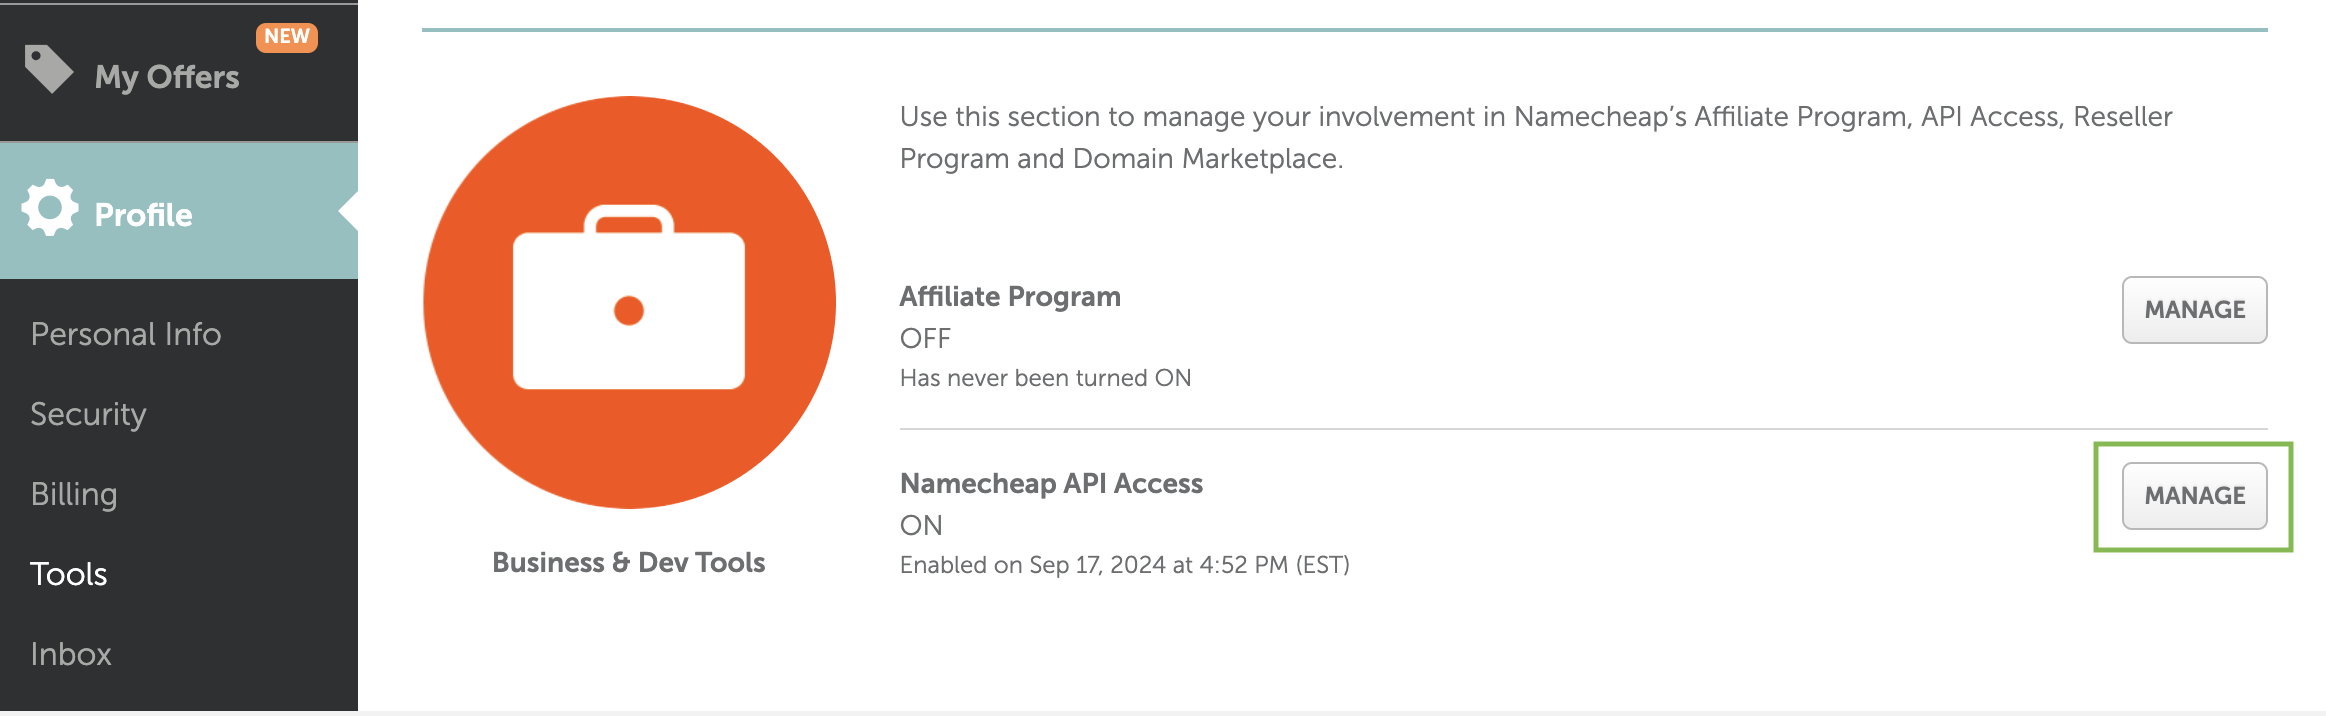
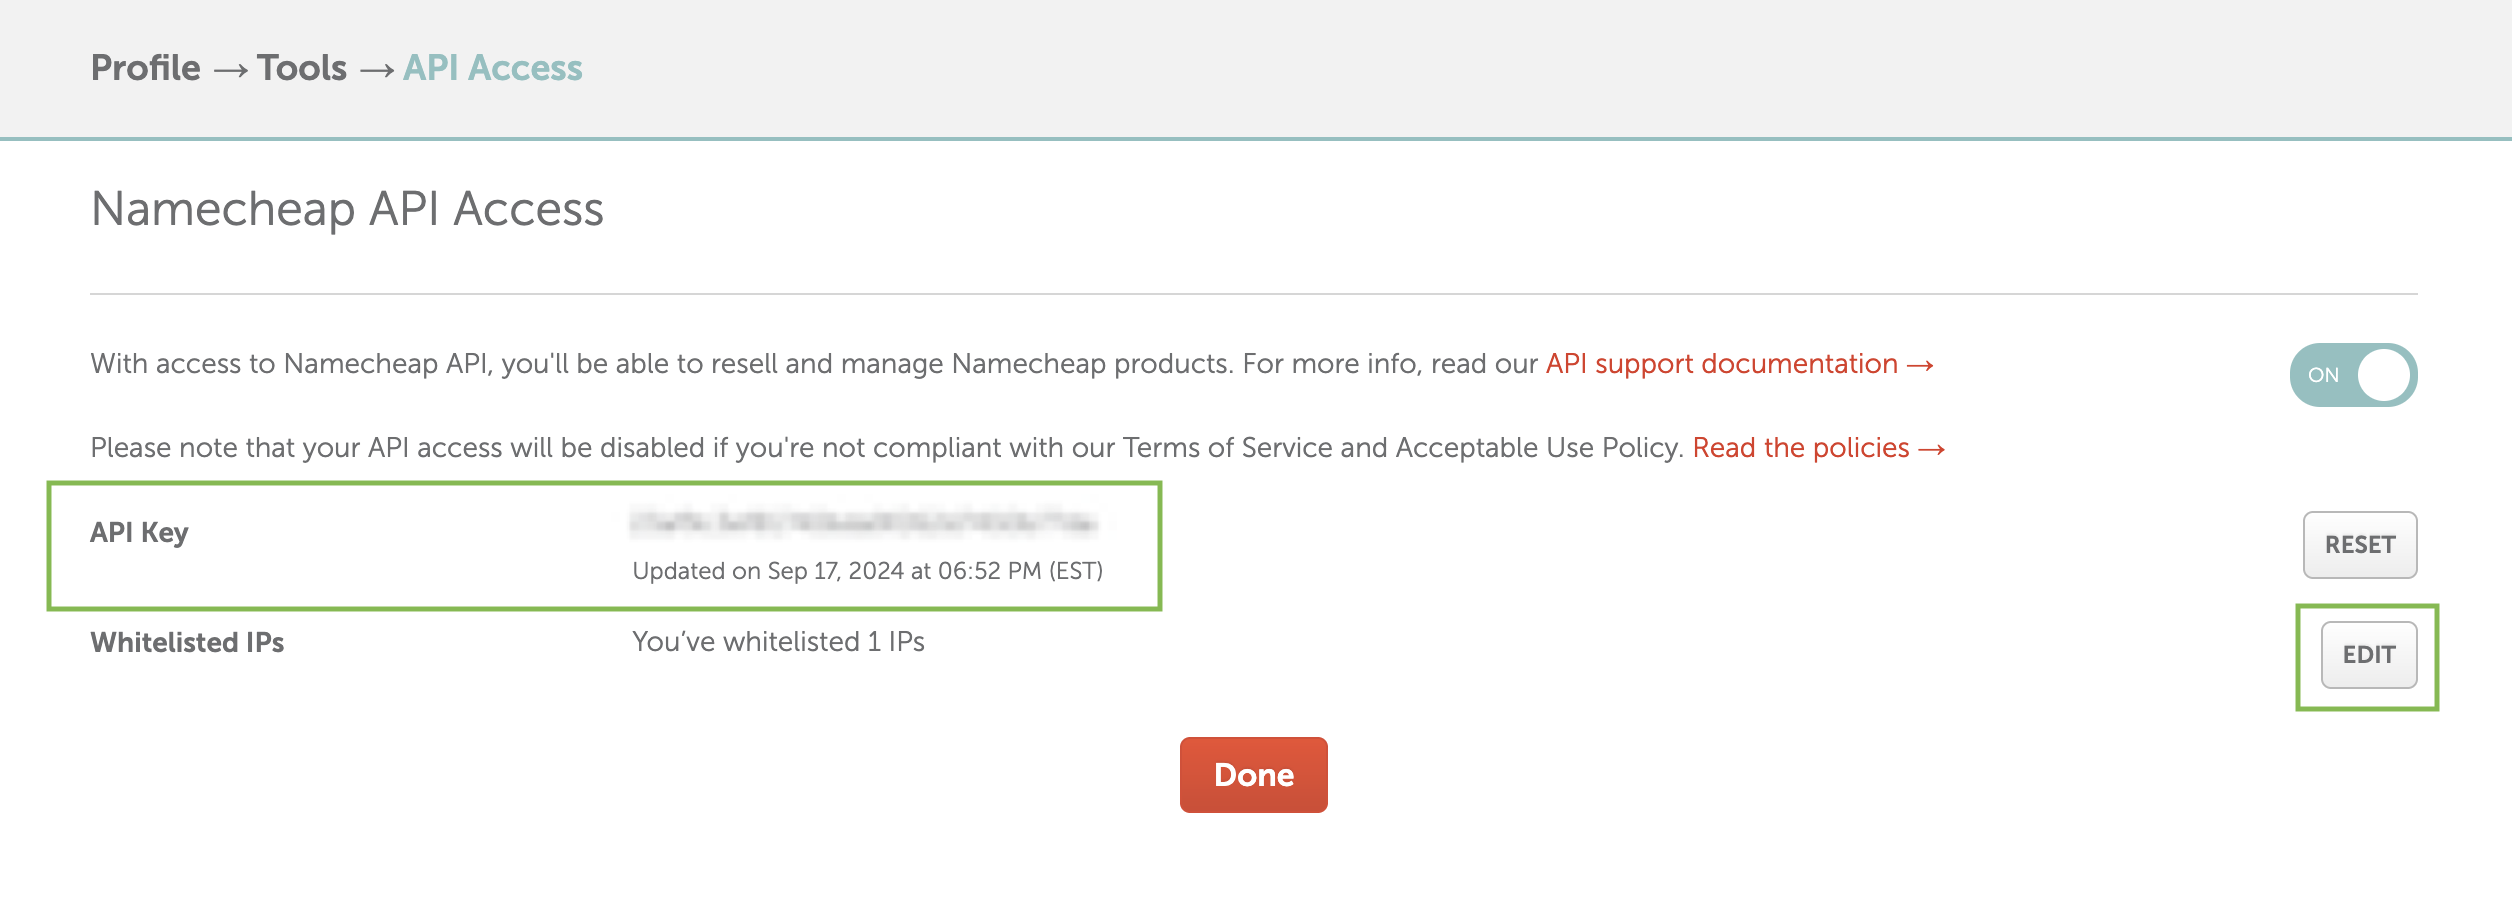
You’ll find your API Key listed there. Note this down as you’ll need it later.
Next, you need to whitelist the public IP address of your Caddy web server. For me, this was my home public IP address. Run curl -4 ifconfig.me or visit https://ifconfig.me/ from your server.
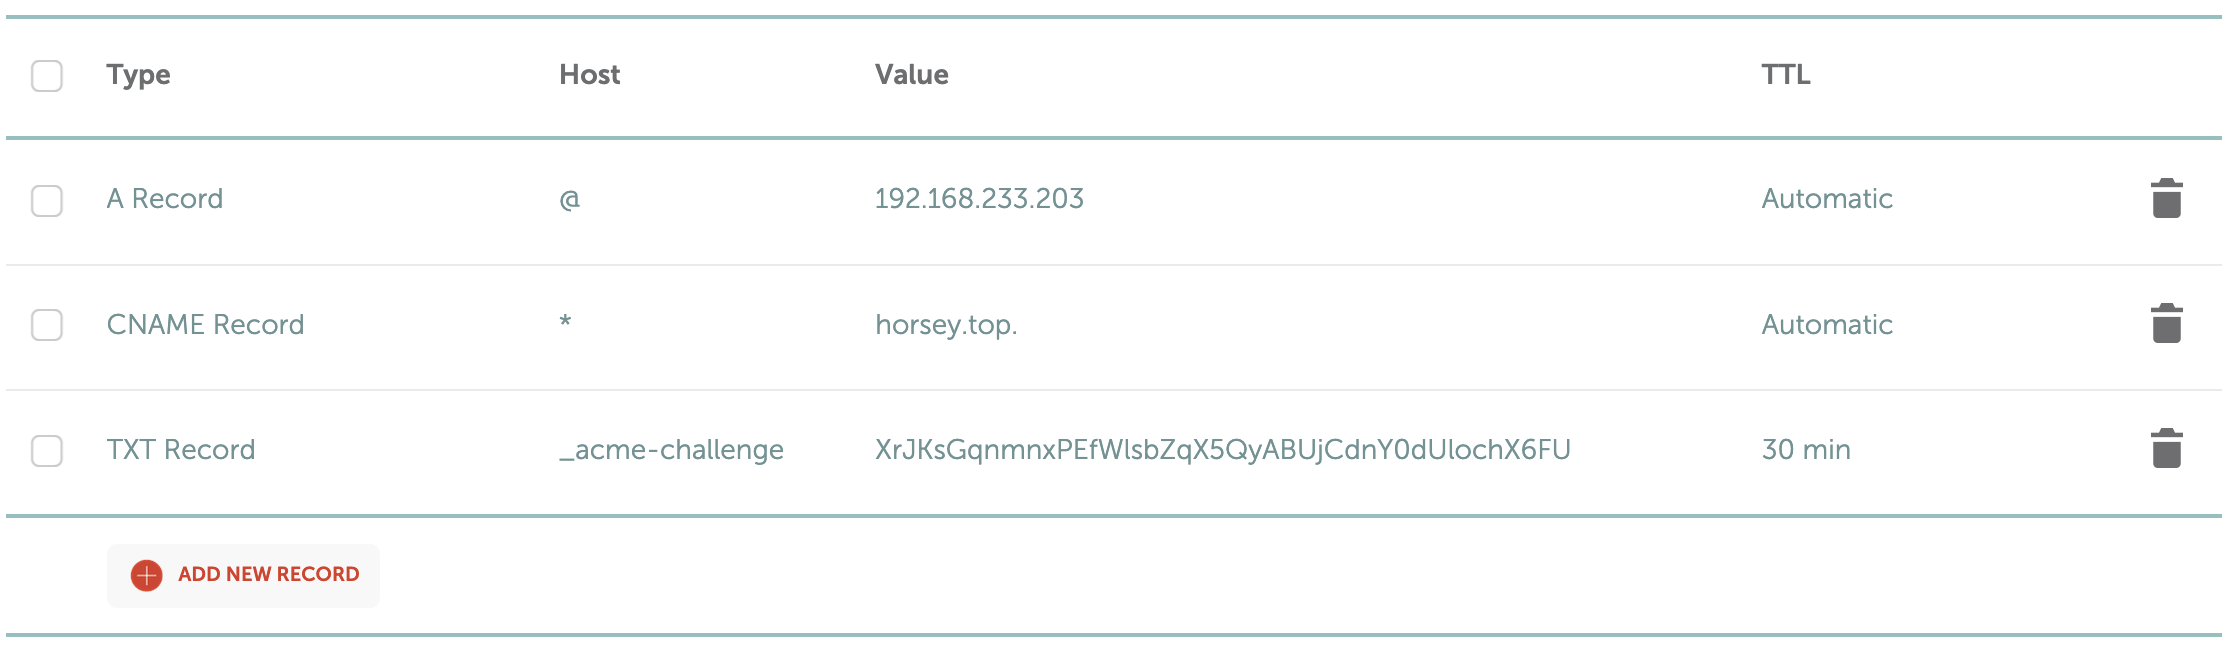
Finally, set the following records for your domain:
Type            Host    Value             TTL
A Record        @       192.168.233.101   Automatic
CNAME Record    *       horsey.top.       Automatic
In the above example my web server’s local IP address would be 192.168.233.101.
Caddy configuration
Note: on Ubuntu/Debian systems, the default location for your CaddyFile is /etc/caddy/Caddyfile. Otherwise, you can create a Caddyfilein your working directory.
I store my Caddyfile file within my home directory (easier to track with Git) and create a symlink pointing back to /etc/caddy/Caddyfile.
To enable the DNS challenge for your site, add a tls directive within your site block in the Caddyfile.
This example shows a reverse proxy to access local services, but the same block would apply to any other website or service.
*.horsey.top {
tls {
dns namecheap {
api_key <YOUR-NAMECHEAP-API-KEY>
user <YOUR-NAMECHEAP-USERNAME>
api_endpoint https://api.namecheap.com/xml.response
client_ip <YOUR-SERVER-PUBLIC-IP>
}
resolvers 1.1.1.1
}
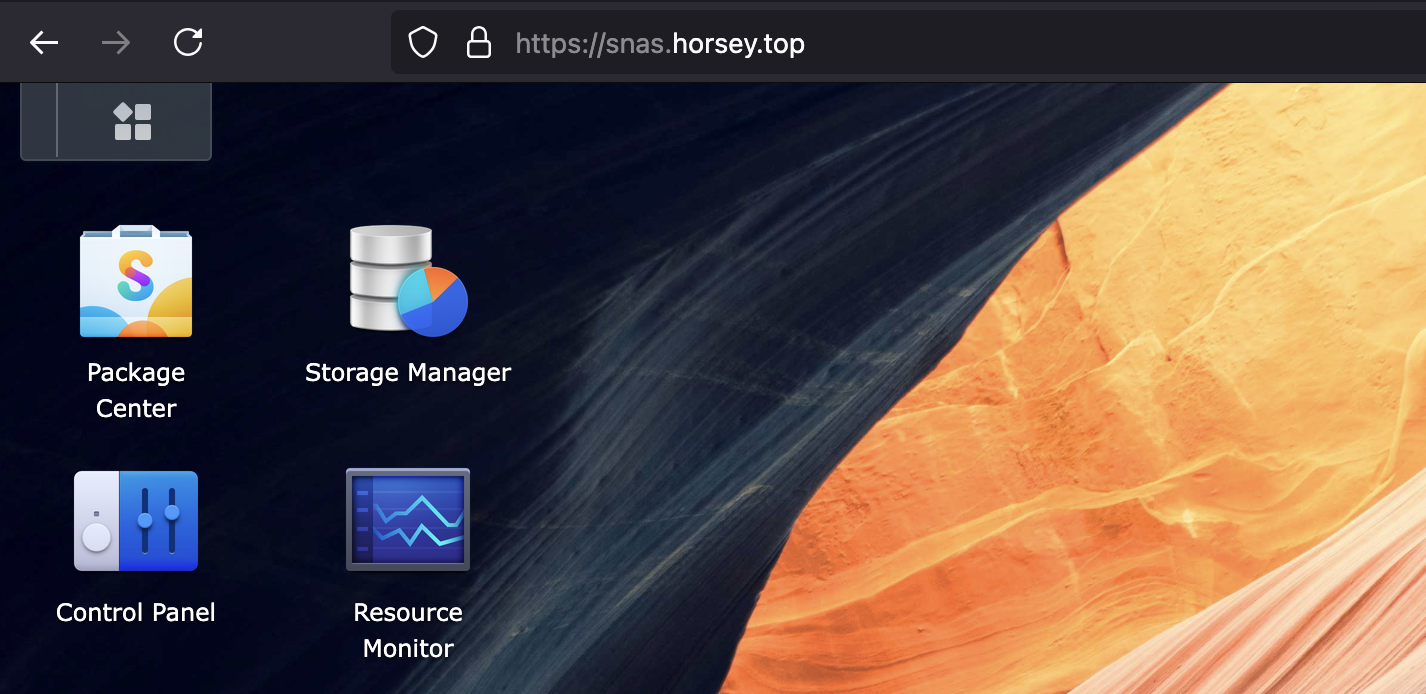
@synology host snas.horsey.top
handle @synology {
reverse_proxy 192.168.1.100:5000
}
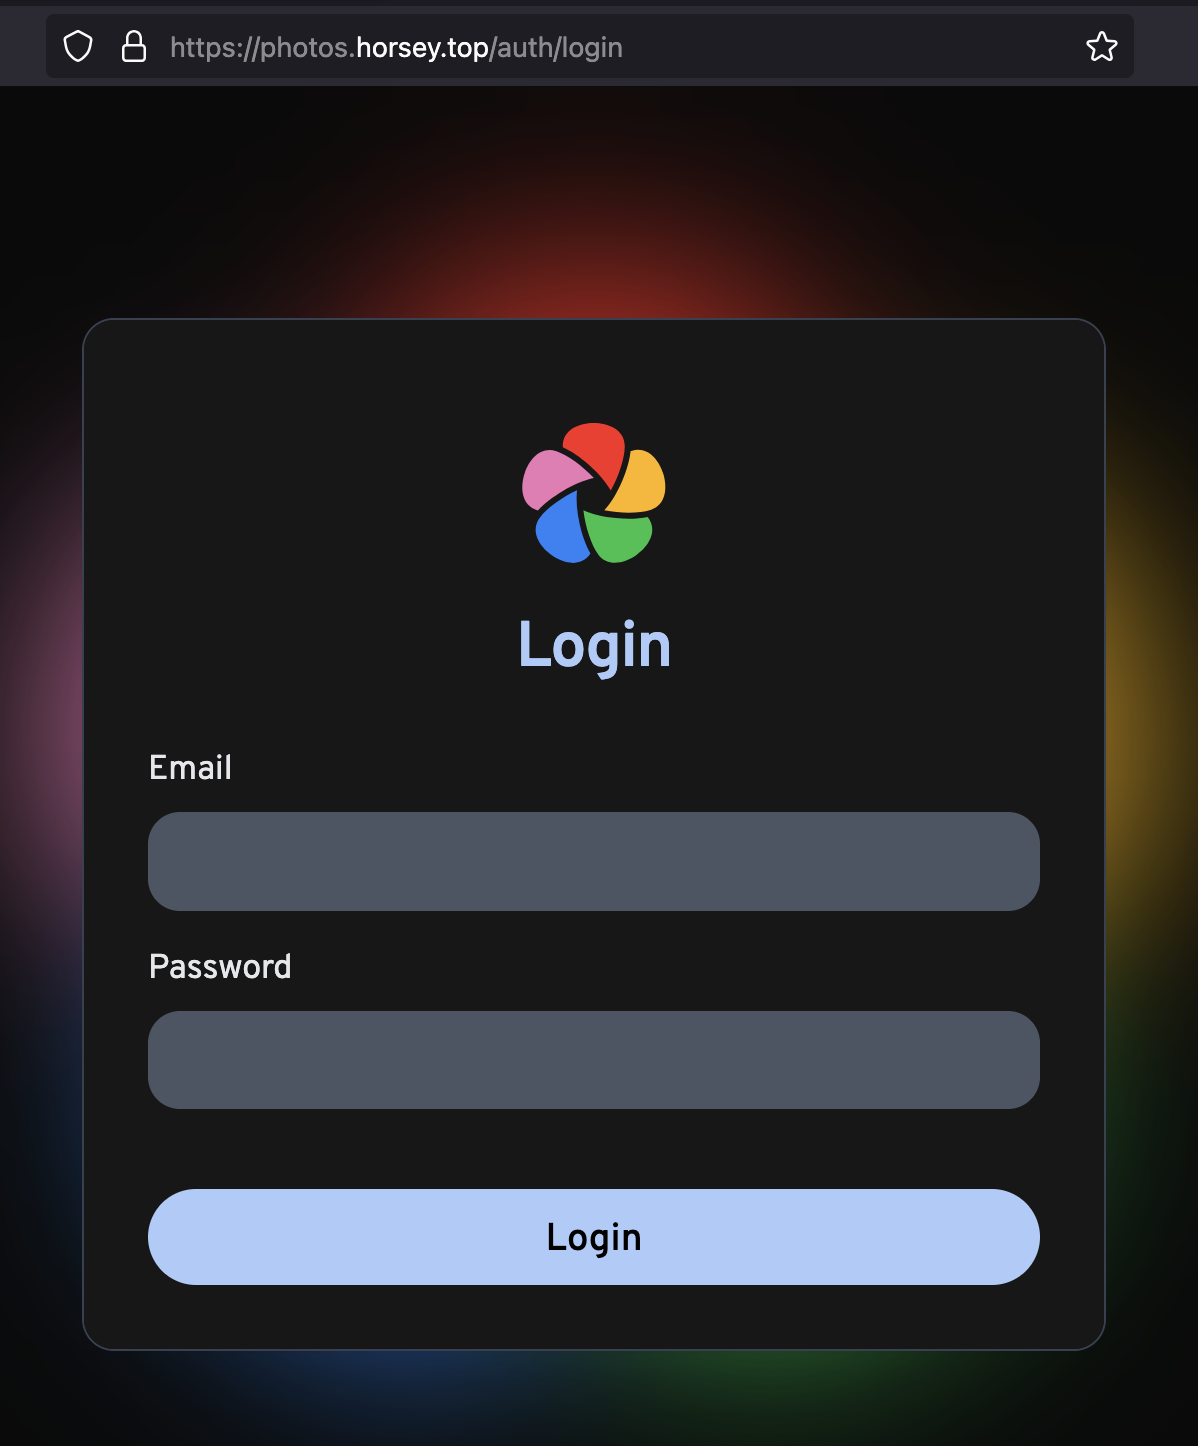
@immich host photos.horsey.top
handle @immich {
reverse_proxy 192.168.1.102:2283
}
@plex host plex.horsey.top
handle @plex {
reverse_proxy 192.168.1.101:32400
}
# Fallback
handle {
respond "Not found!"
}
}
Start the server
Once your Caddyfile is updated, start Caddy with the updated config.
# Run caddy in foreground
caddy run --config ./Caddyfile

# OR when running caddy as a systemd service
sudo systemctl reload caddy
Verify SSL certificate
Looking at Caddys output, you can see Caddy obtaining our certificate. It may take between 1-5 mins for the process to complete.
Note: When running as a systemd service, Caddy’s output will be redirected to
journalctl.
# View logs when running caddy as a systemd service
journalctl -u caddy --no-pager | less +G
In your domain’s Advanced DNS settings page on Namecheap, you’ll see an _acme-challenge TXT record added to the host records.
2025/03/02 13:01:40.483	INFO	tls	finished cleaning storage units
2025/03/02 13:01:40.483	INFO	tls.obtain	lock acquired	{"identifier": "*.horsey.top"}
2025/03/02 13:01:40.483	INFO	tls.obtain	obtaining certificate	{"identifier": "*.horsey.top"}
2025/03/02 13:01:40.485	INFO	tls.issuance.acme	waiting on internal rate limiter	{"identifiers": ["*.horsey.top"], "ca": "https://acme-v02.api.letsencrypt.org/directory", "account": ""}
2025/03/02 13:01:40.485	INFO	tls.issuance.acme	done waiting on internal rate limiter	{"identifiers": ["*.horsey.top"], "ca": "https://acme-v02.api.letsencrypt.org/directory", "account": ""}
2025/03/02 13:01:40.485	INFO	tls.issuance.acme	using ACME account	{"account_id": "https://acme-v02.api.letsencrypt.org/acme/acct/1954270156", "account_contact": []}
2025/03/02 13:01:40.644	INFO	tls.autosave	autosaved config (load with --resume flag)	{"file": "/var/lib/caddy/.config/caddy/autosave.json"}
2025/03/02 13:01:40.644	INFO	tls.serving	serving initial configuration
2025/03/02 13:01:41.289	INFO	tls.issuance.acme.acme_client	trying to solve challenge	{"identifier": "*.horsey.top", "challenge_type": "dns-01", "ca": "https://acme-v02.api.letsencrypt.org/directory"}
2025/03/02 13:02:19.668	INFO	tls.issuance.acme.acme_client	authorization finalized	{"identifier": "*.horsey.top", "authz_status": "valid"}
2025/03/02 13:02:19.668	INFO	tls.issuance.acme.acme_client	validations succeeded; finalizing order	{"order": "https://acme-v02.api.letsencrypt.org/acme/order/1954270156/359491177665"}
2025/03/02 13:02:20.255	INFO	tls.issuance.acme.acme_client	got renewal info	{"names": ["*.horsey.top"], "window_start": 1746015798, "window_end": 1746188598, "selected_time": 1746032528, "recheck_after": 1740942140.2554002, "explanation_url": ""}
2025/03/02 13:02:20.513	INFO	tls.issuance.acme.acme_client	got renewal info	{"names": ["*.horsey.top"], "window_start": 1746015798, "window_end": 1746188598, "selected_time": 1746037107, "recheck_after": 1740942140.513732, "explanation_url": ""}
2025/03/02 13:02:20.513	INFO	tls.issuance.acme.acme_client	successfully downloaded available certificate chains	{"count": 2, "first_url": "https://acme-v02.api.letsencrypt.org/acme/cert/03e4783ff4aa1374806d2b9c3de960f419c0"}
2025/03/02 13:02:20.514	INFO	tls.obtain	certificate obtained successfully	{"identifier": "*.horsey.top", "issuer": "acme-v02.api.letsencrypt.org-directory"}
2025/03/02 13:02:20.514	INFO	tls.obtain	releasing lock	{"identifier": "*.horsey.top"}
You can check the certificate was correctly obtained by running the following command and reading the “Server certificate” section.
curl -vI https://your-domain.comSuccess
You now have a web server running locally with a custom domain with HTTPS! How beautiful is that? Thanks for reading and have fun building! 🧑💻